Let’s talk wedding invitations. The single most important thing (other than your handsome groom) for your wedding day. Without wedding invitations, your family and friends will not know when and where to show up for your big day — duh!
I was surprised to find the lack of information out there on doing acrylic wedding invitations. I was even more surprised to find how difficult this task ended up being, but mainly because I was being really picky and didn’t like the invitation suite options I saw on Etsy. So we decided to go the DIY route with the help of Studio Noel and Papier to design these modern acrylic wedding invitations. This was a special element that took our wedding invitation up a notch, if I do say so myself!
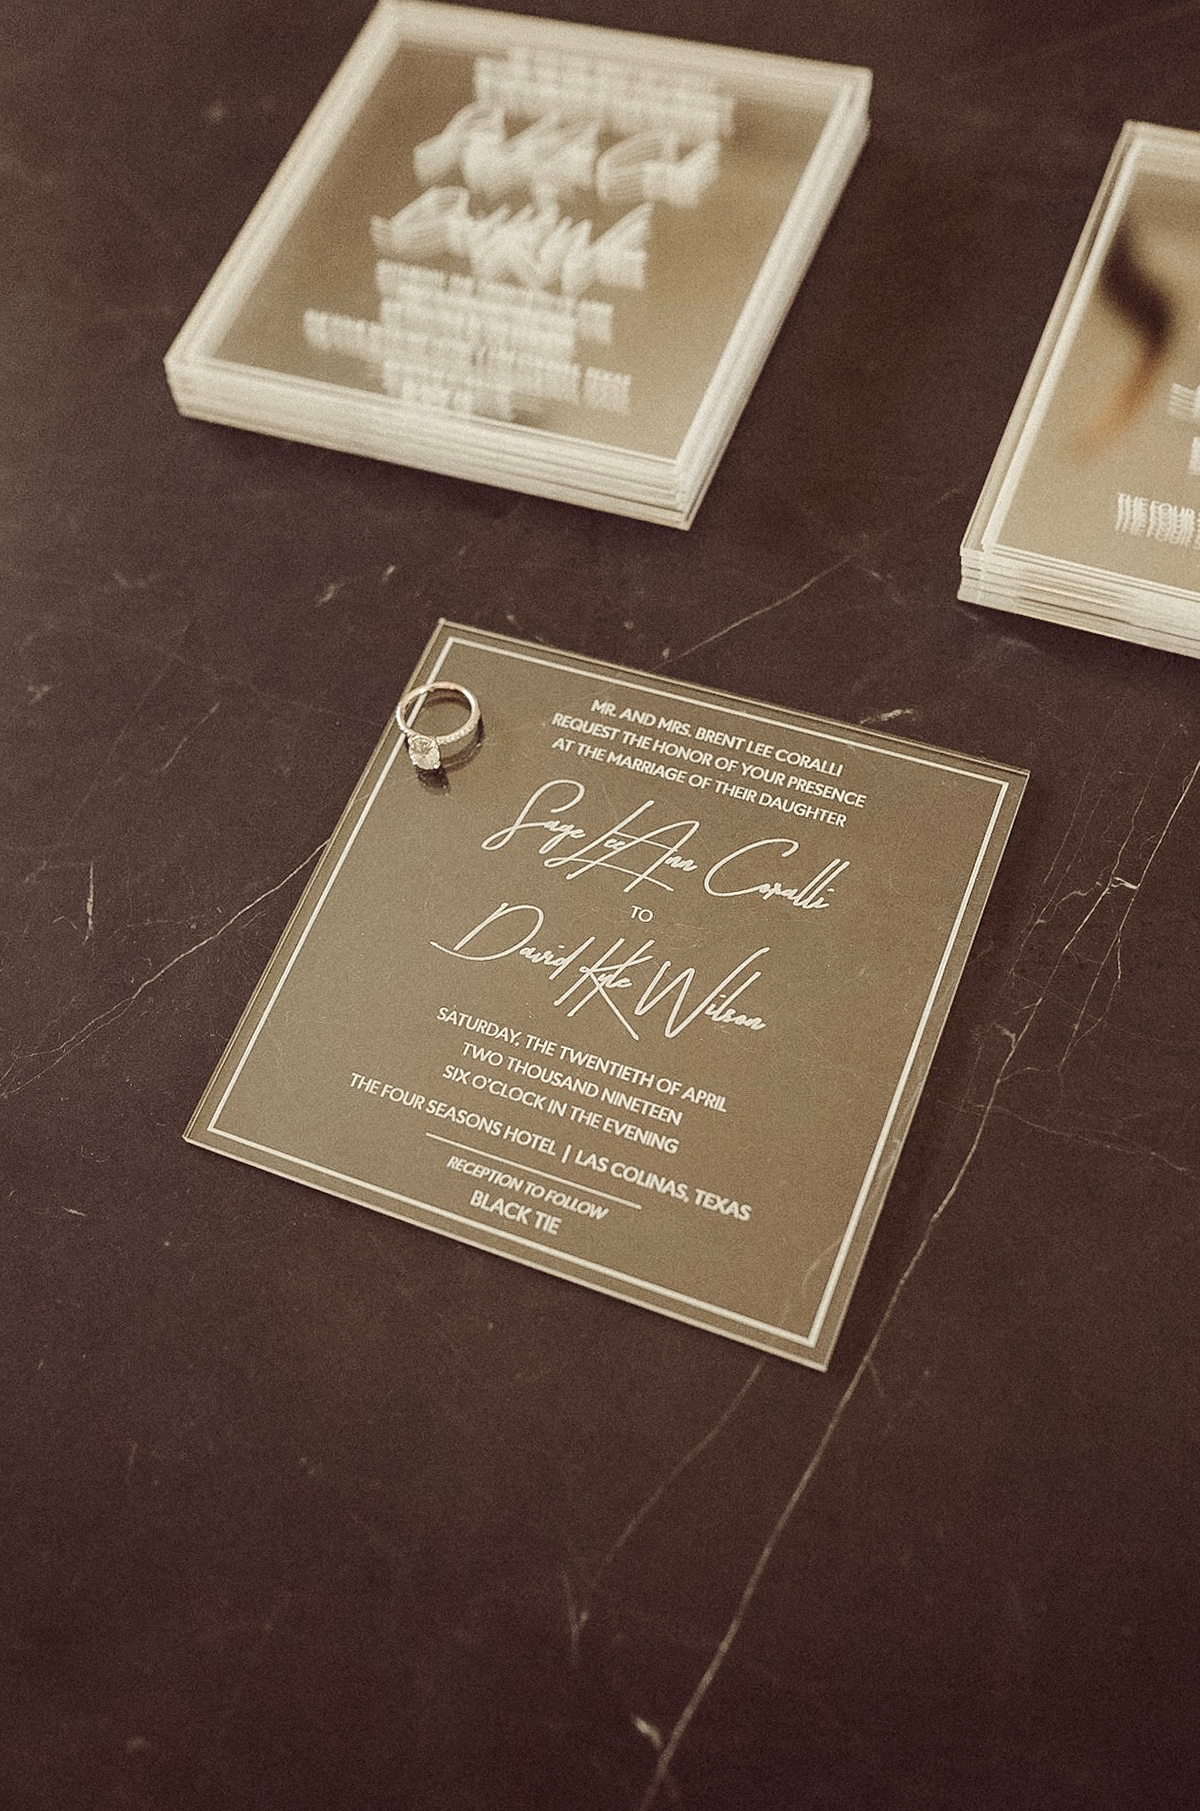
Designing our wedding invitations with a non-traditional touch was super important to me. Don’t get me wrong, I am all about traditional elements. But I wanted something a little unique that screamed So Sage. Dramatic, if you will.
My inspiration behind the acrylic wedding invitations came from many years of saving wedding photos on Pinterest (long before I was ever engaged). I was daydreaming about this event for years and I know I’m not the only one!
So how do you take a traditional wedding invitation and make it modern? Add acrylic (and a few other things)! Here are all the details…
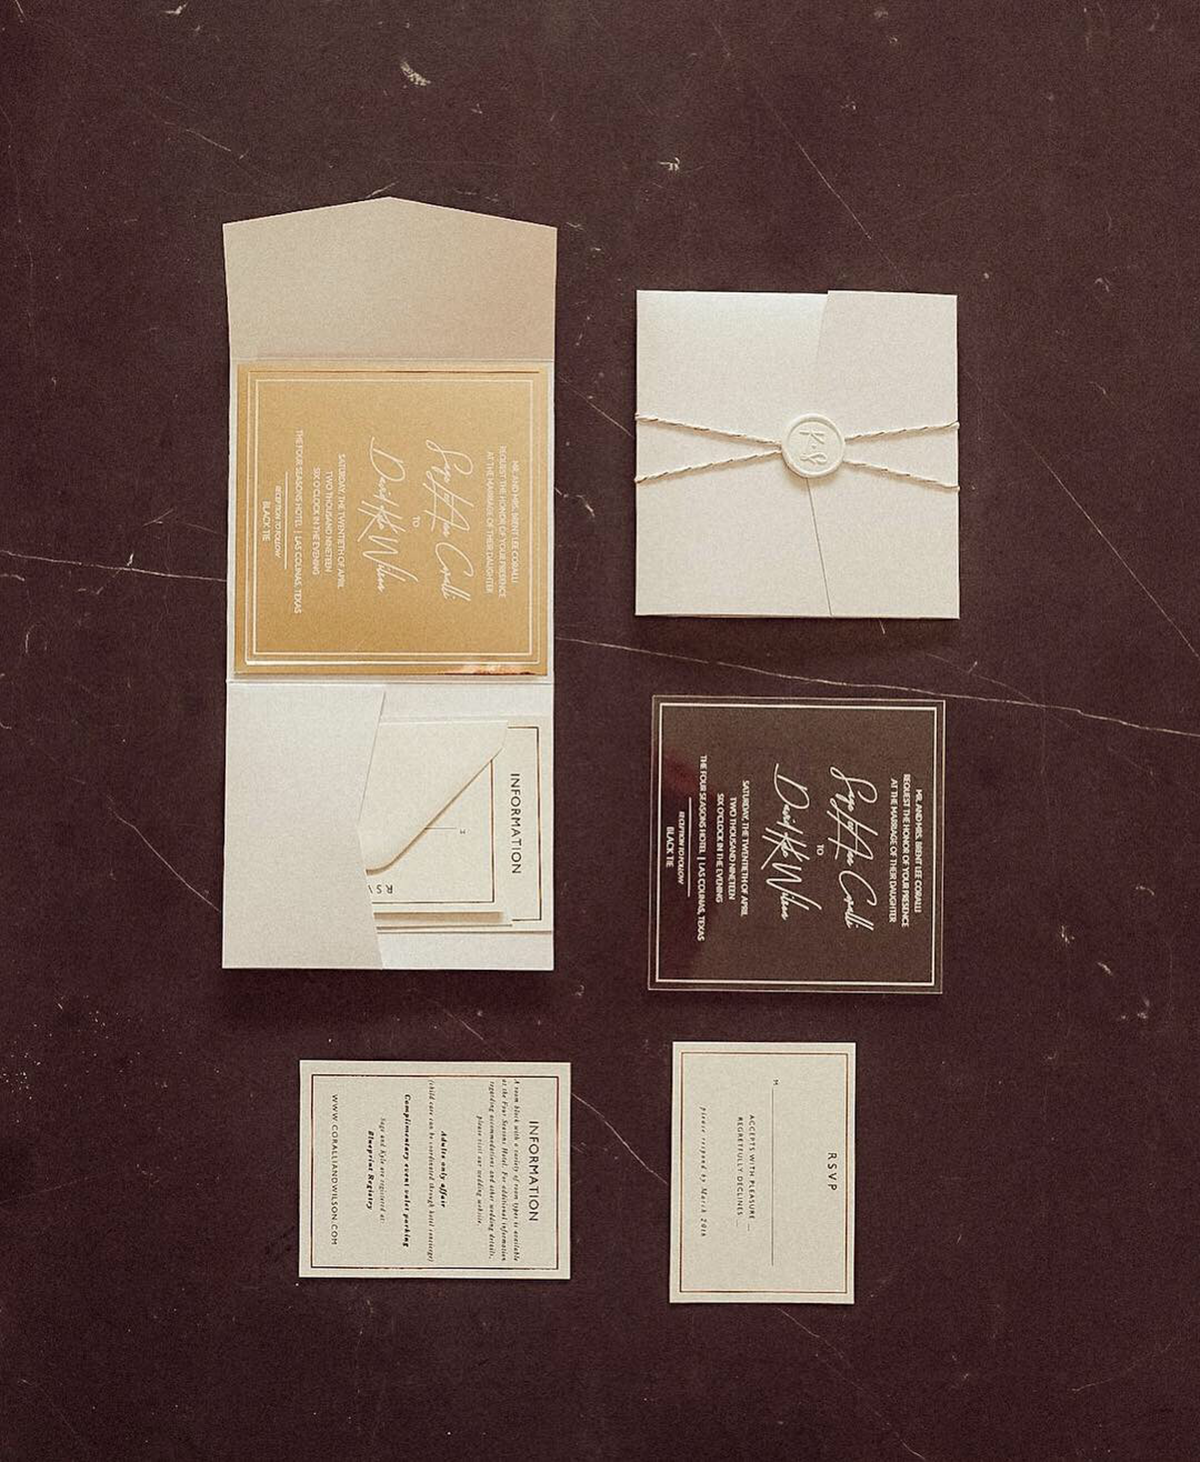
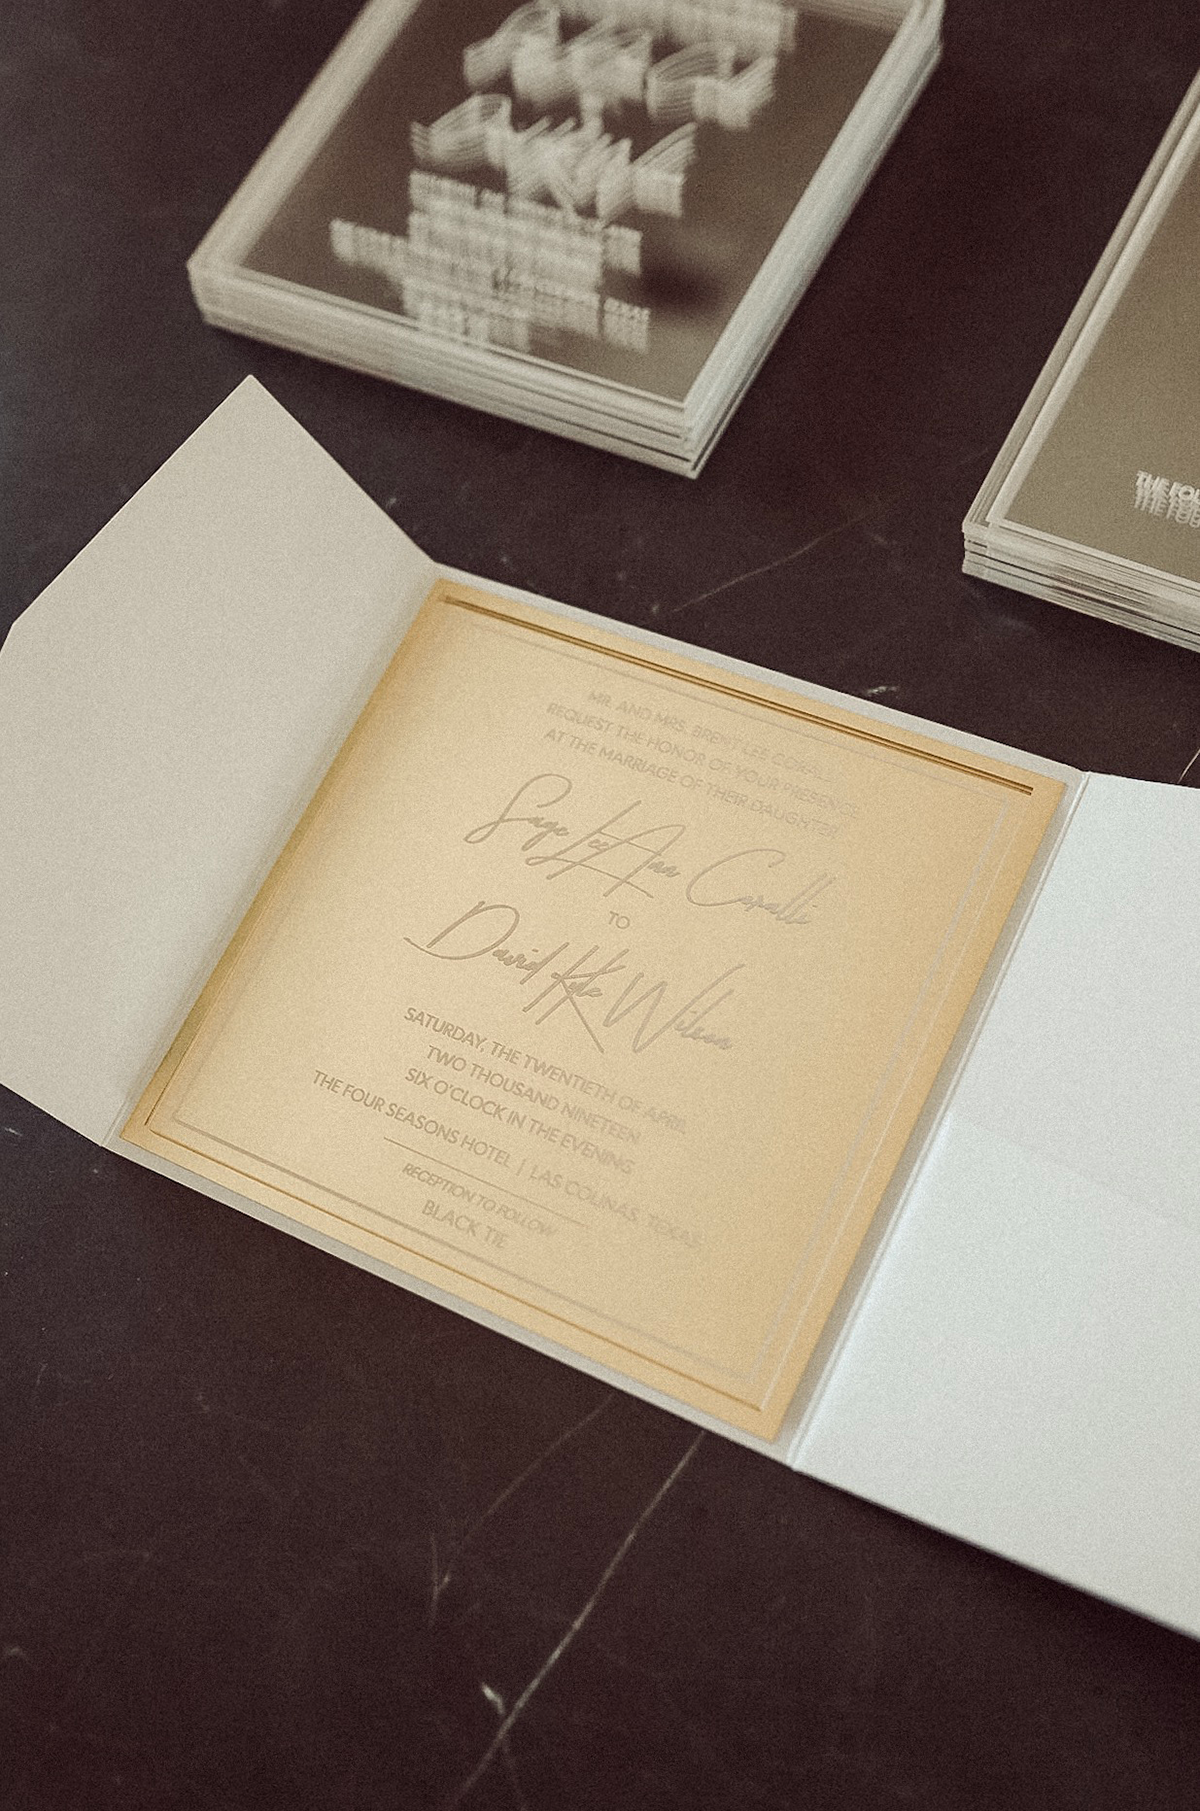
- Acrylic – We decided to go with the clear acrylic in a square shape because of the clean lines. We also thought the text was a fun option because it was a signature font paired with a clean type font. If you are more on the traditional side, you could go with a curvy shape acrylic and cursive text. Studio Noel can help you design it to be the exact shape and font you want to have!
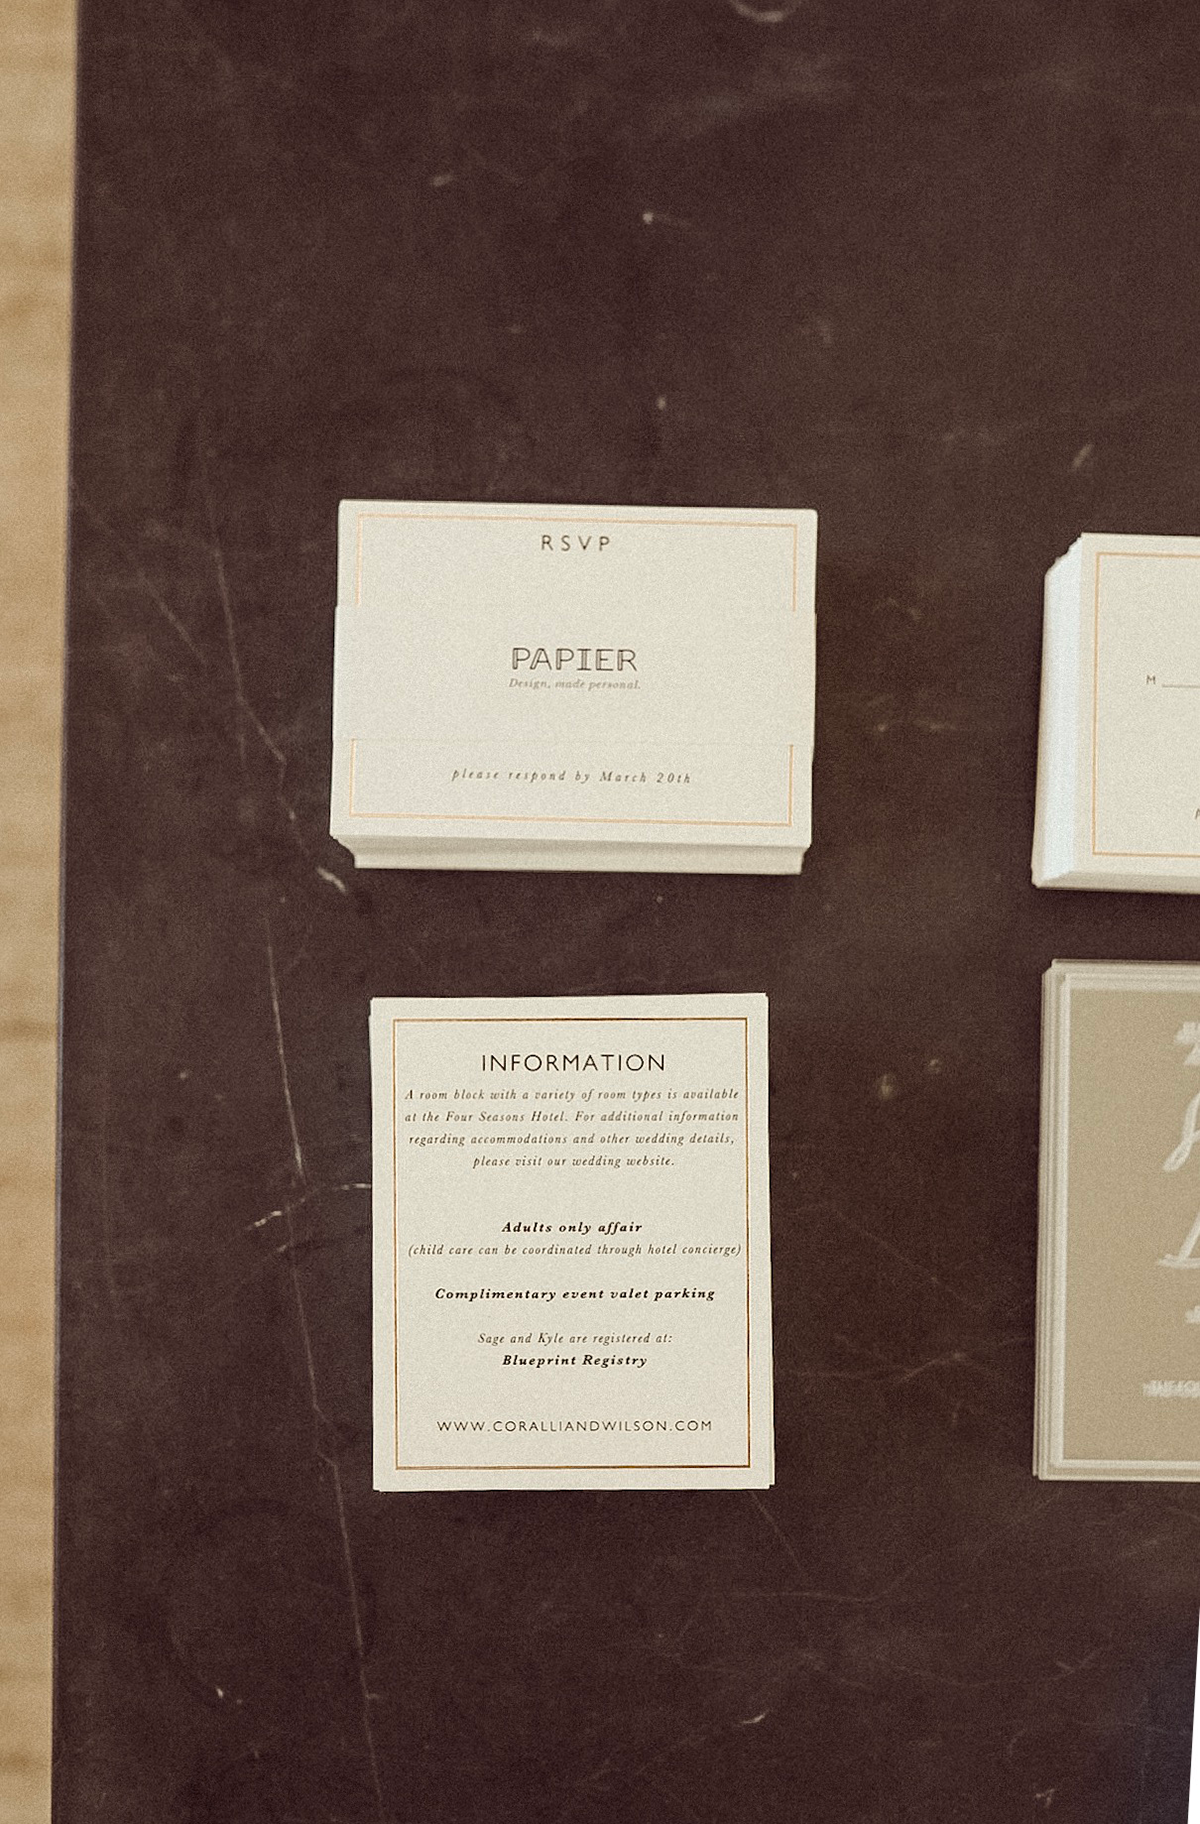
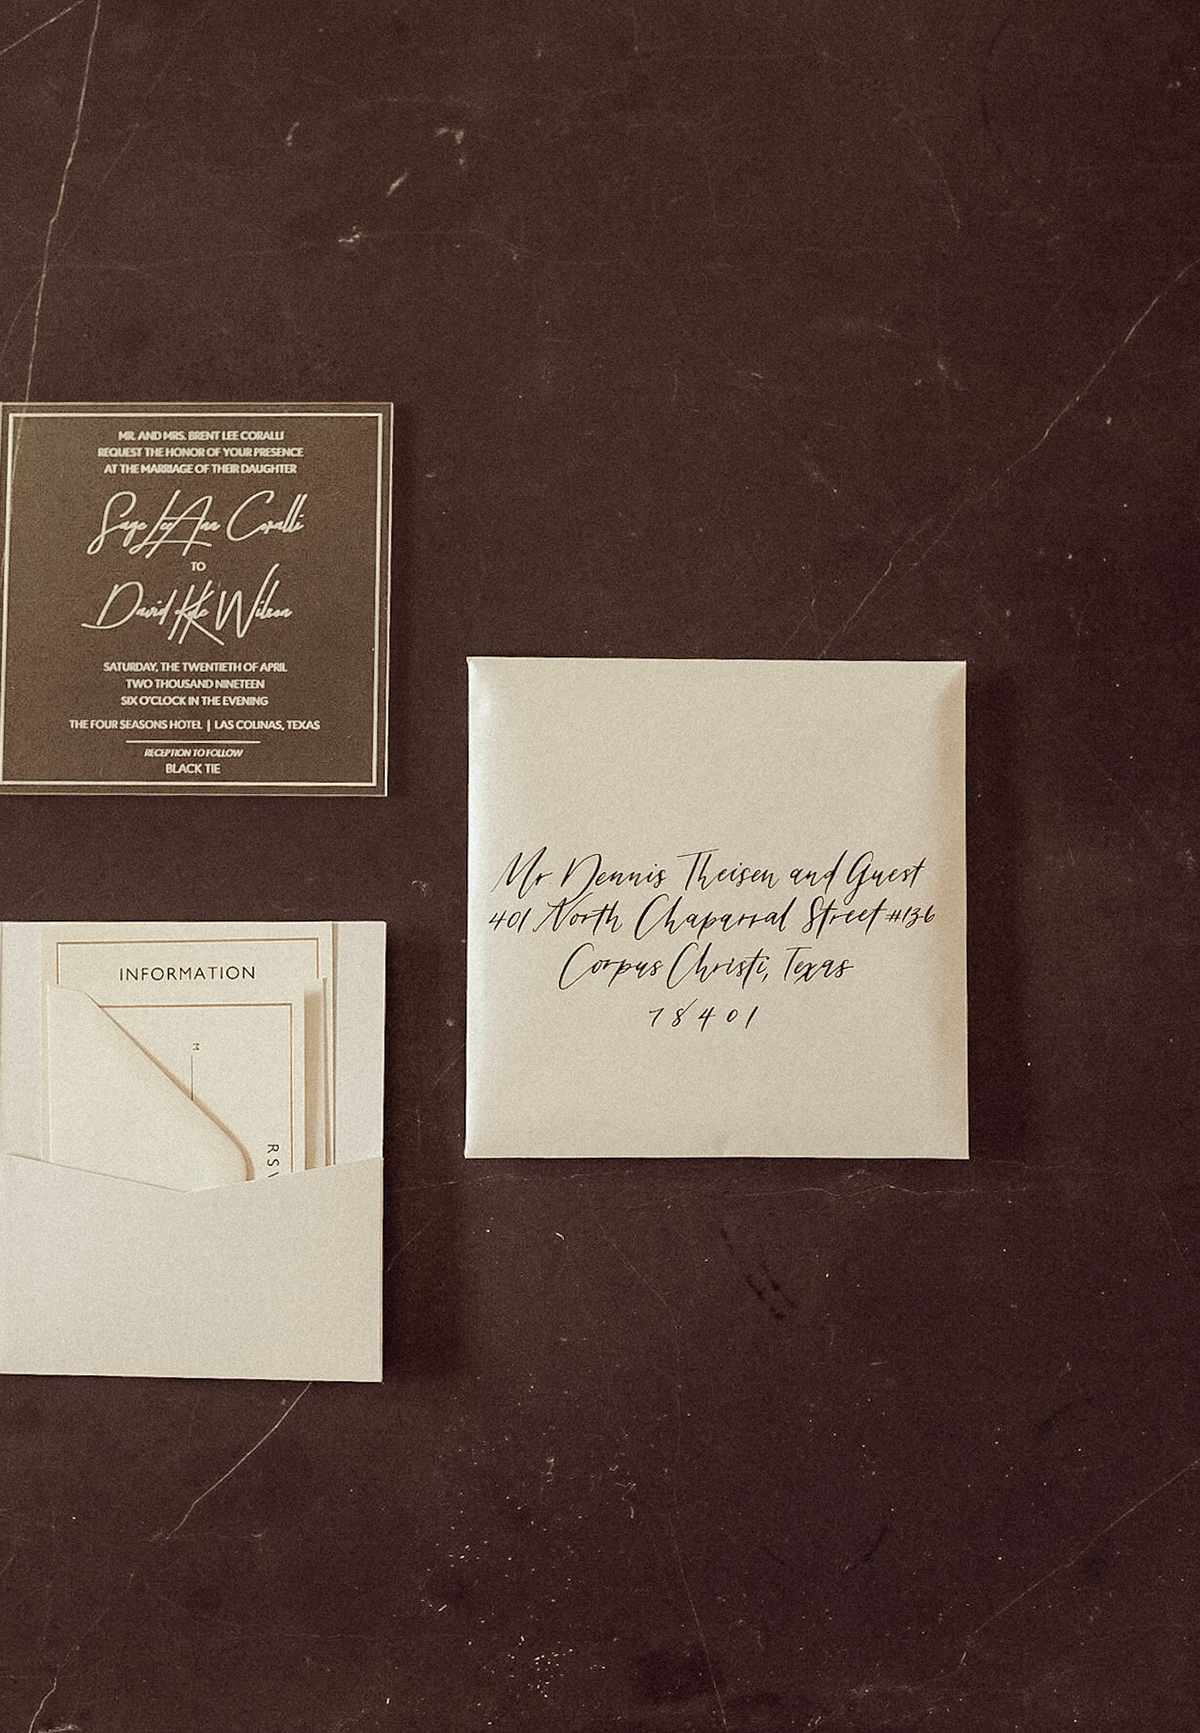
- Paper Inserts – Our paper inserts were from Papier, where we also got our beautiful Save the Dates! I love their unique options and their quality of paper/printing. We went with this suite and actually used the invitation part for our rehearsal dinner invites and the other two cards to pair with our acrylic wedding invitation.
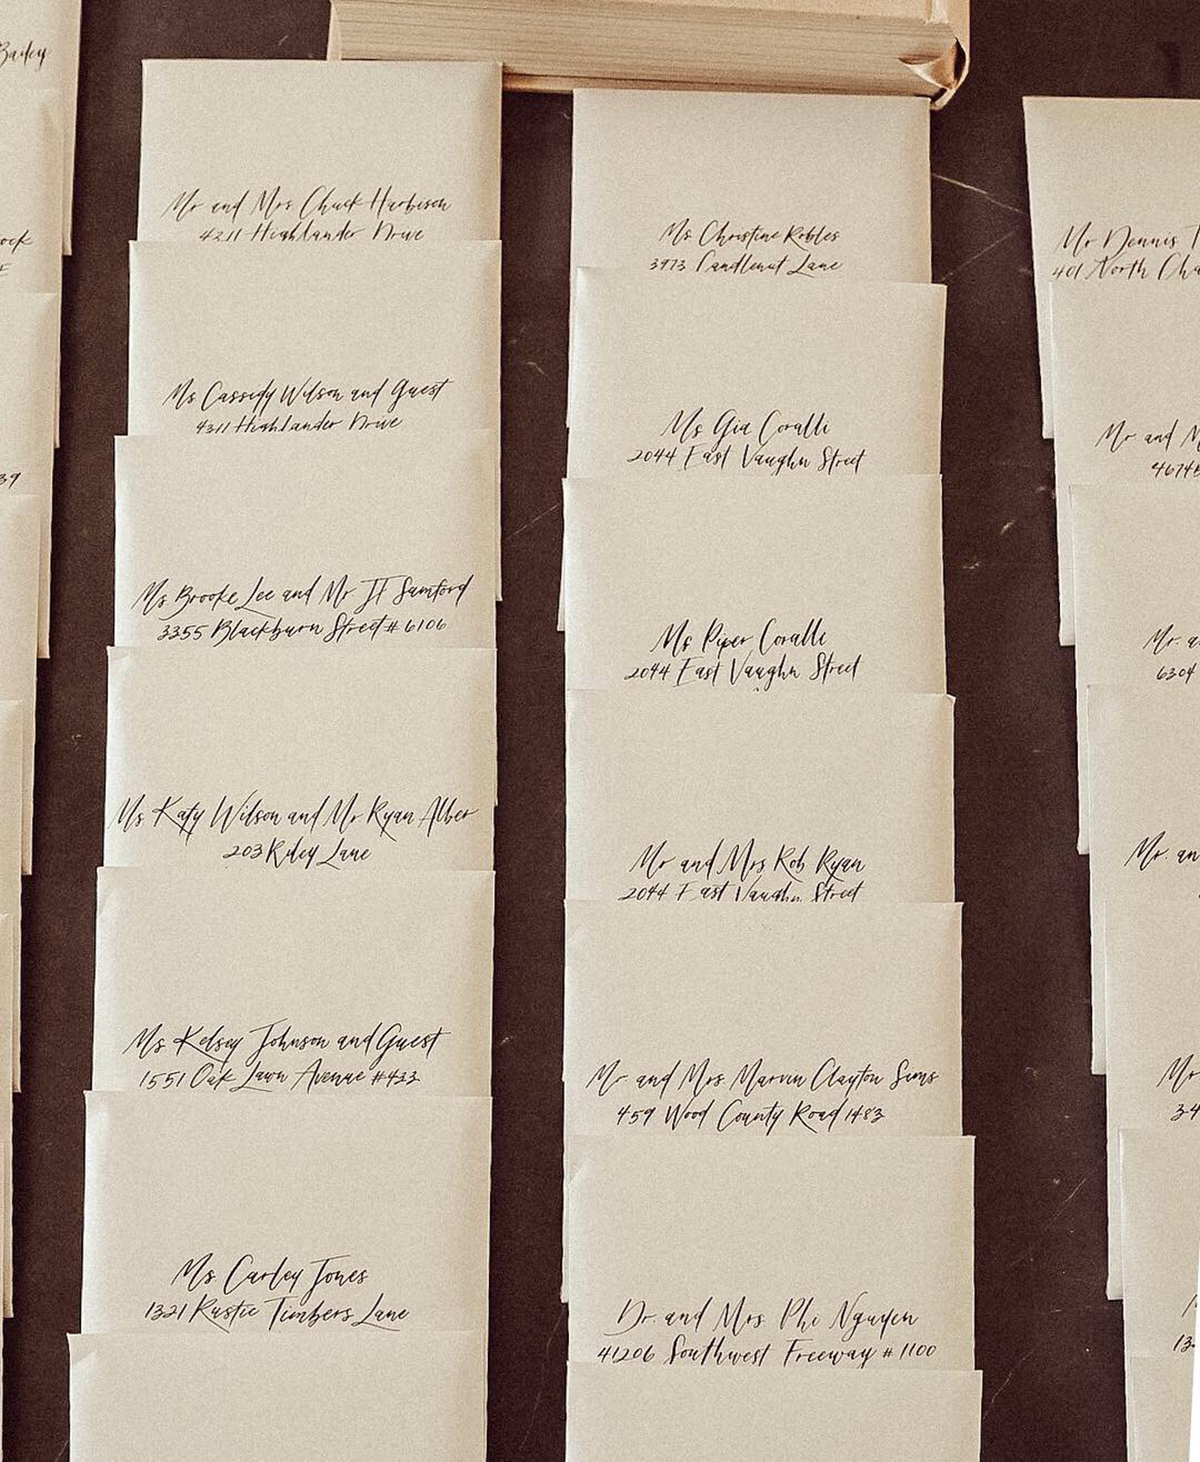
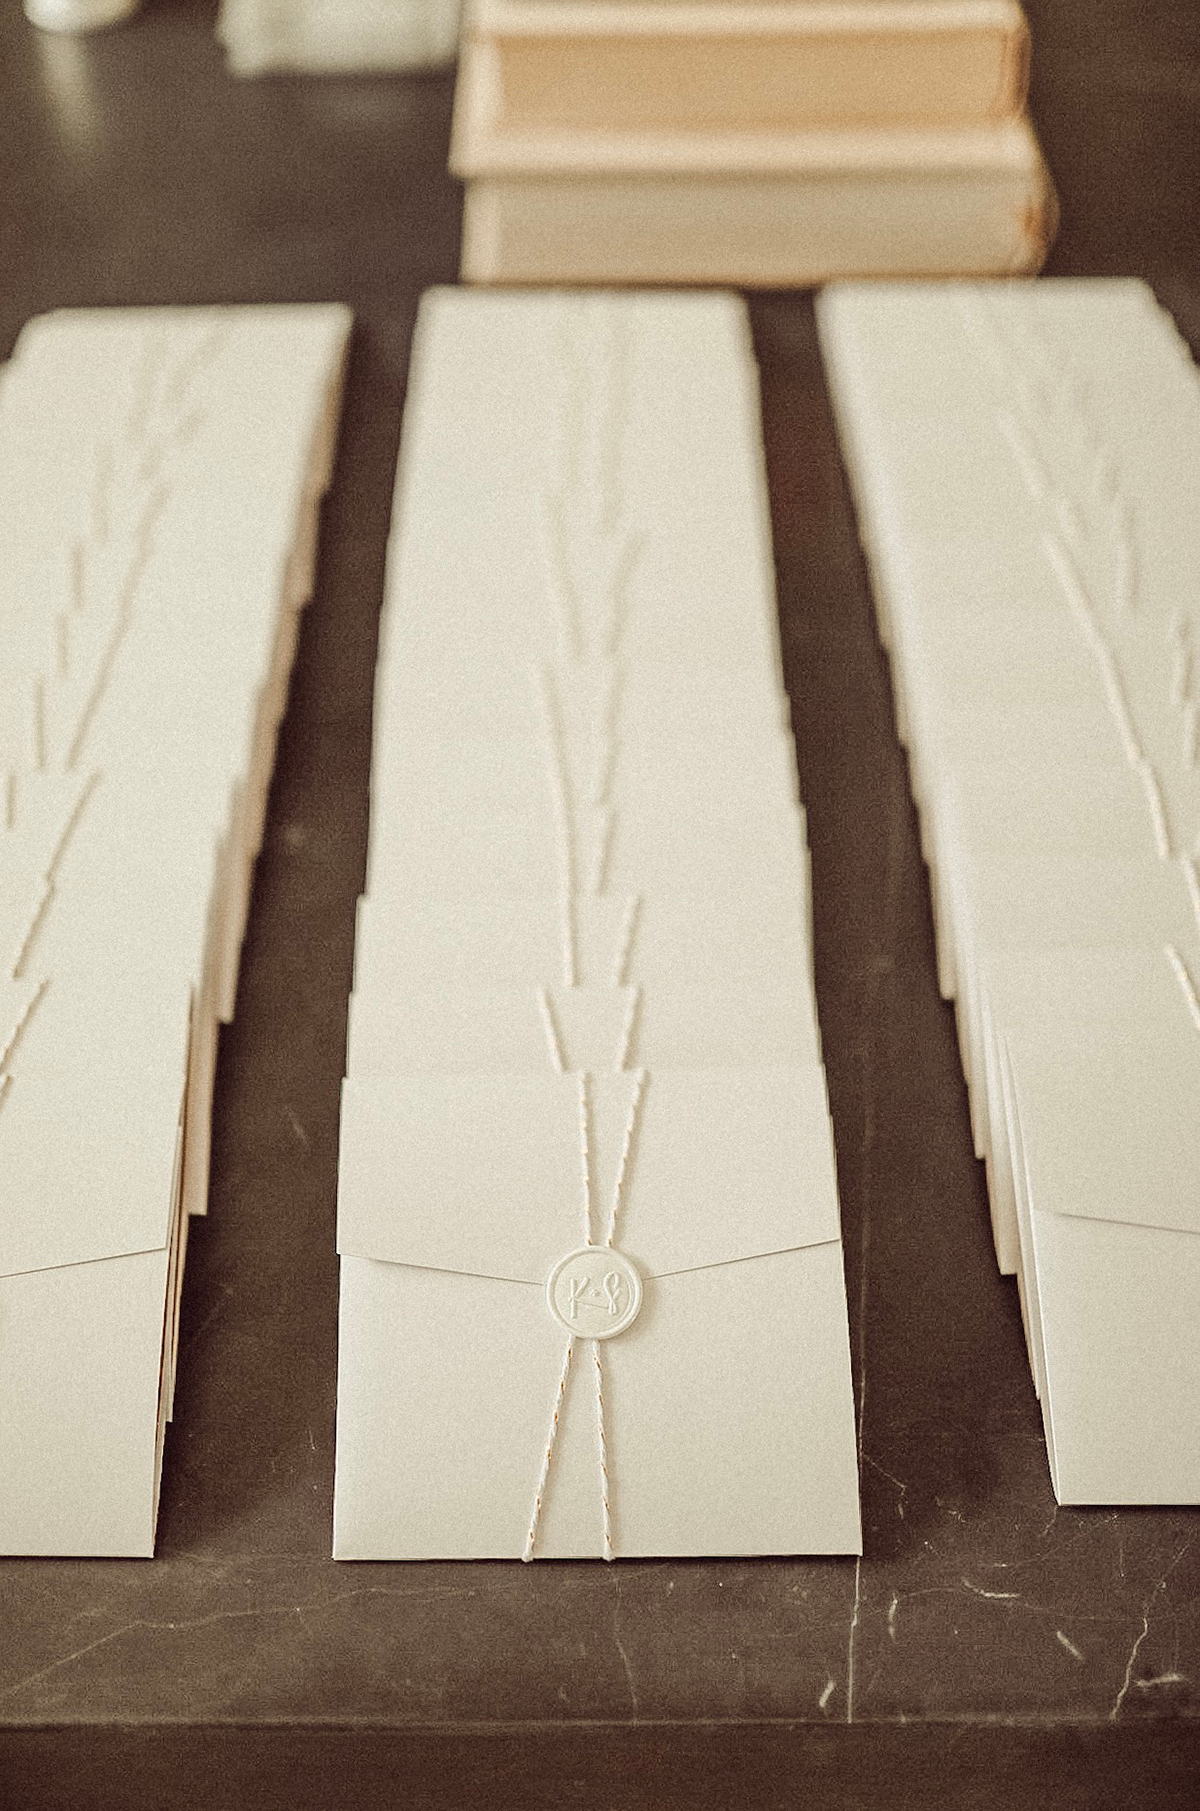
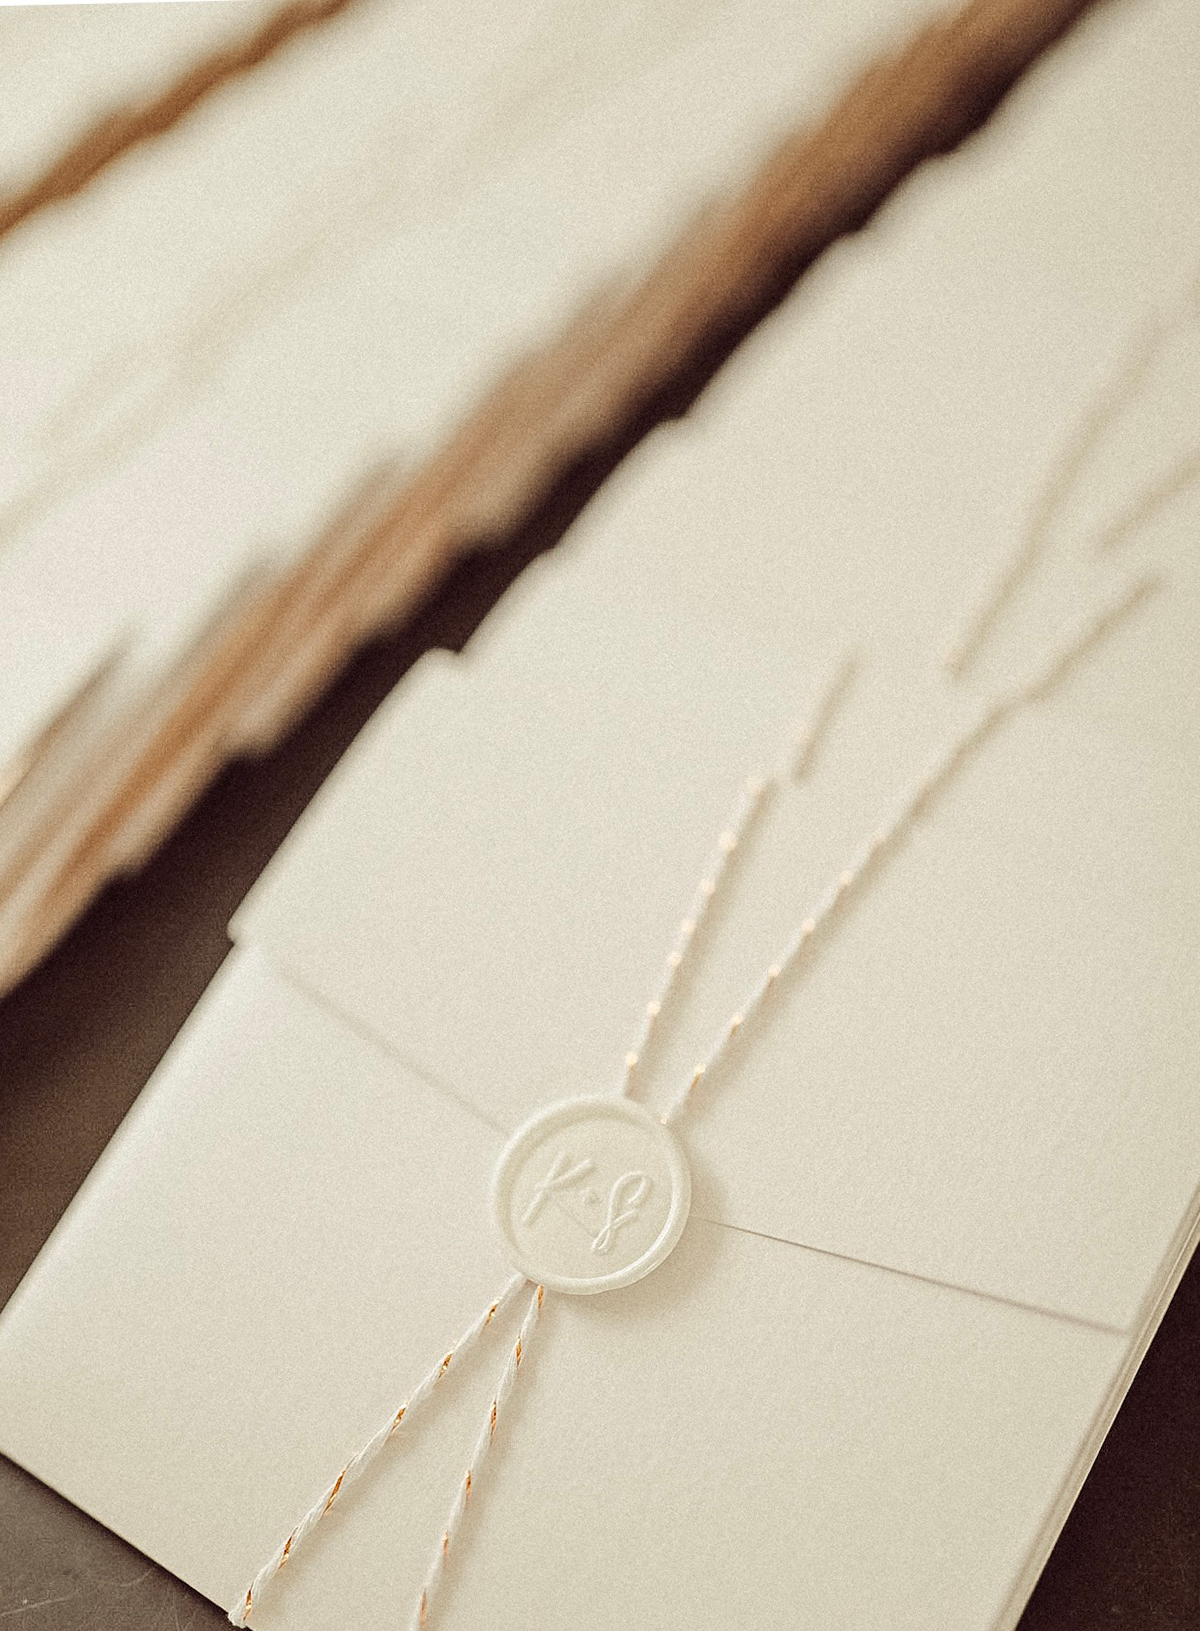
- Folders/Envelopes – My mom scoured the internet and found these great pocket folders from Cards & Pockets. We got them in the color Snow White, size 6×6 and they were perfect for our square acrylic pieces.
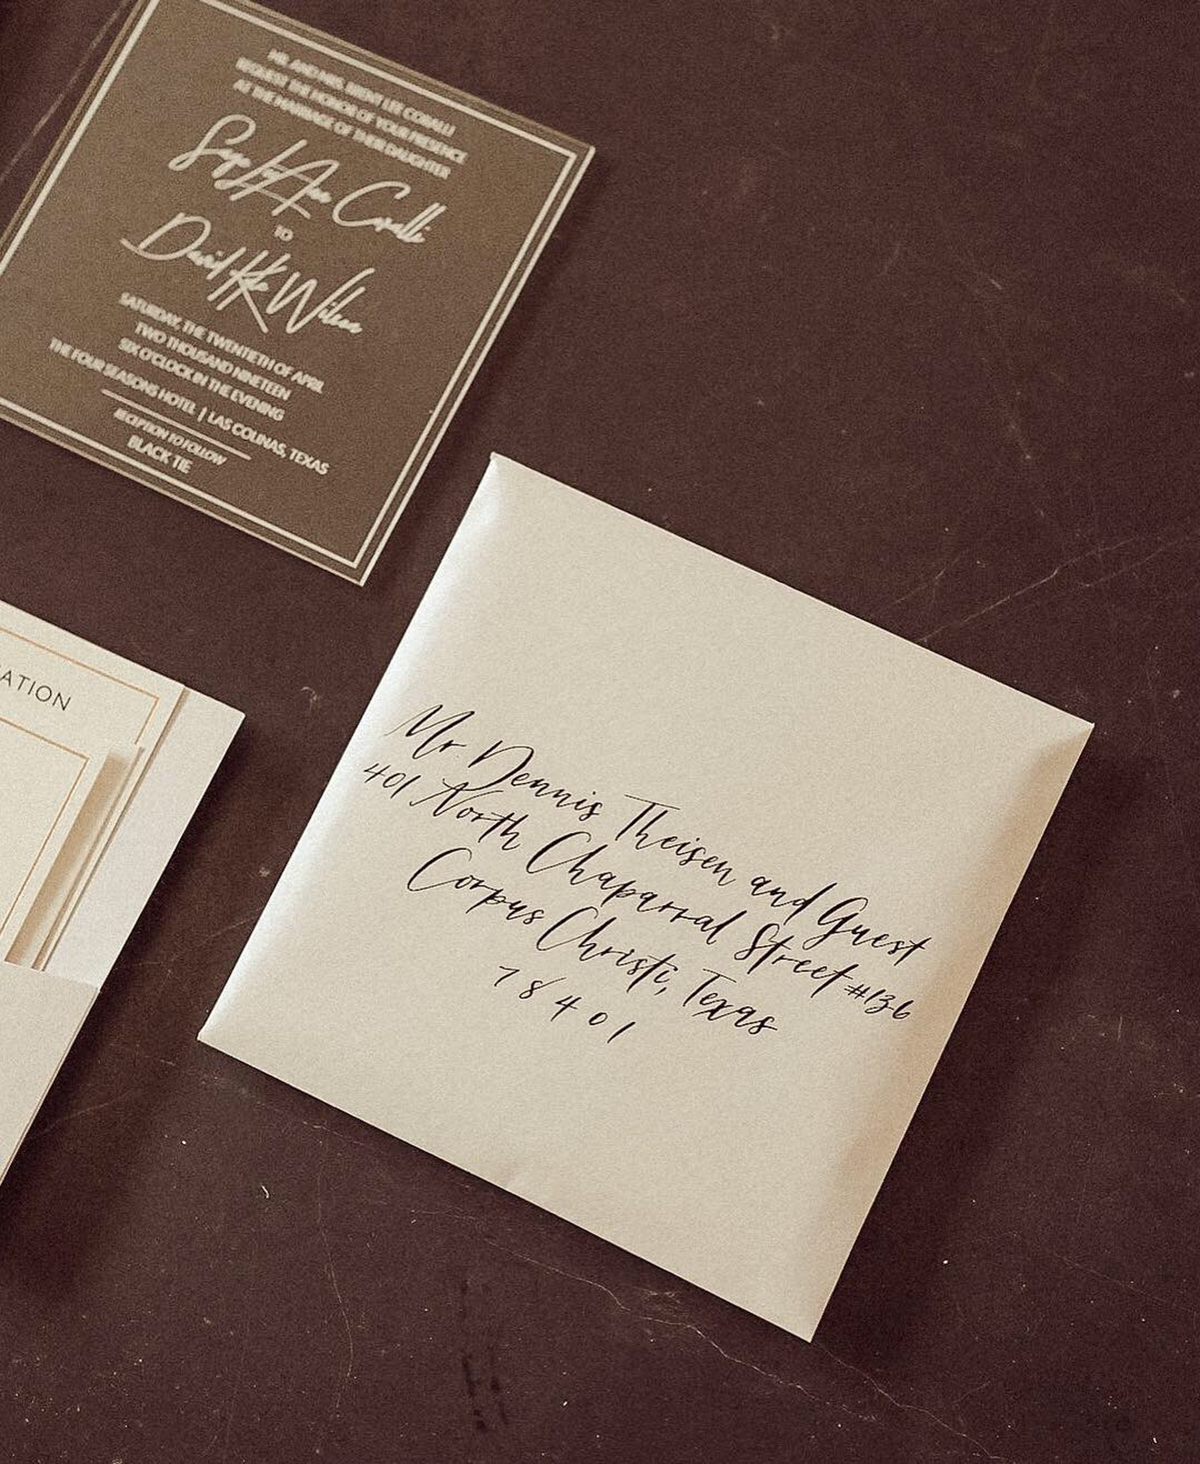
- Calligraphy – We used Polished Pen Calligraphy locally here in Dallas. She was so easy to work with and her handwriting is absolutely beautiful! I loved the contrast of the black on white here too. You can see more of her beautiful work on Instagram.
- Wax Seal – We ordered a custom stamp from Etsy (I made the graphic myself) and bought a wax glue gun from Stamptitude. These are different than your traditional glue guns because they don’t get as hot. There are a ton of vendors that sell these pre-stamped with adhesive on the back already, but this was actually a fun project making these! If you DIY this part, be sure to follow the steps they provide on their website for the best results.
I still can’t get over these invitations. They make me want to get married again!! A huge, huge thank you to Studio Noel for making these stunning acrylic invitations, Papier for the paper goods, and Polished Pen Calligraphy for the gorgeous calligraphy. We had the best reactions from our guests after they received these in the mail and many said they had never seen anything like it before!
I have been dying to share these with you guys, how do you think they turned out?
XO.


Alison
08.10.19Your wedding invitation suite is beautiful…..what is the gold backing to the acrylic invite and how did you mount that to the pocket fold?
Aw thank you!! I got this at the same place we got the pocket invitations. It just layed flat behind the acrylic and wasn’t attached in any way to the pocket fold. It was in there loosely, but stayed put while folded because we carefully closed the pocket and tied the string tightly to hold it in place. Hope this helps!
Hannah Cromer
09.24.19Hi! What size was your actual acrylic invite if it fit in the 6×6 pocket? Also, about how much was the invites from Studio noel?
steroid injection bodybuilding
References:
https://gaiaathome.eu/gaiaathome/show_user.php?userid=1871914
scioto downs casino
References:
https://luxnews.com.br/the-25-best-cities-you-can-find-in-italy-to-satisfy-the-love-for-pasta/
777 poker
References:
ronnebycafematsal.se
how much are steroids on the street
References:
md.un-hack-bar.de
genting casino birmingham
References:
baurundschau.ch
References:
Omni casino
References:
https://librosensayo.com
cherokee casino siloam springs
References:
http://www.bandsworksconcerts.info
References:
Stratosphere Hotel Zimmer online spielhallen